Monthly Archives: March 2021

Growing Veggies in Containers

Do you dream of a delicious, homegrown harvest but don’t have the land to use? No longer should a shortage of garden space prevent you from growing your own fresh vegetables. As long as you have a sunny location you can have your own mini-farm on your porch, patio, deck, balcony, roof-top or doorstep!

Why Use Containers?

The benefits of growing containerized vegetables go beyond the issue of space. There are plenty of other compelling reasons to plant your veggies in pots, including…

  1. Vegetables are amazingly ornamental and can be just as decorative as any other container plants or flowers.
  2. There are fewer problems with pests such as groundhogs, deer and rabbits and soil borne diseases.
  3. The soil in pots warms up more quickly in the spring allowing for earlier planting and an extended growing season.
  4. Less bending, squatting and kneeling is required for gardeners with limited mobility.

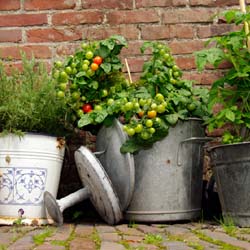
Vegetables can be grown in any vessel that can hold soil, has adequate drainage and is large enough to hold a plant. There are endless options available on the market or you may recycle items that you already have as long as they meet these requirements. Use your imagination – try a wheelbarrow, wine barrel or just a plastic bin, and you’re ready to plant!

Best Vegetables for Containers

While all veggies can be grown in containers, some are better suited than others. Plants that grow particularly large, that sprawl or that must be grown in large numbers to ensure an adequate yield may take more effort and careful site planning with an adequate container. Similarly, vining plants need not be avoided. Trellis these plants up against a wall or fence or allow them to cascade down from a taller pot or a container placed up high like on a stone wall. For smaller selections, a hanging basket or window box may be used. Many sprawling and vining vegetables are now available by seed in dwarf, compact or bush varieties. These are bred specifically for small spaces and containers and are worth seeking out.

Tips for Container Vegetable Gardens

Growing vegetables in containers does take some unique thought and isn’t quite the same as planting in a traditional garden. When planning your delicious container garden, consider…

  • Containers: Size matters when planting in containers. The bigger the container, the more soil it can hold. More soil more and more moisture means less watering. Take note that porous containers like terra cotta dry out more quickly and will therefore require more frequent watering.
  • Soil: When planting, choose a good quality potting mix. Soil from the ground may contain insects or disease or may be too heavy. Add an all-purpose balanced fertilizer at time of planting. It is also good idea to mix water absorbing polymers into the soil. These granules can hold up to 400 times their weight in water and help reduce watering from 30-50 percent.
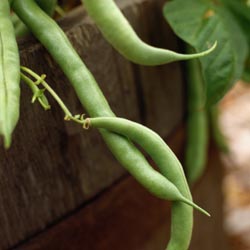
  • Plants: Some of the vegetables that you select may be directly seeded into your container; these would include peas, beans, radishes and corn. With most vegetables you may wish to transplant seedlings into your container, either home-grown or garden center purchased. You will generally find a wider selection of vegetable varieties and unique options available in seed as opposed to purchased seedlings, if you want to use your containers experimentally.
  • Supports: Supports should be placed at time of planting for large or vining plants. This will ensure the young plants are not disturbed or damaged with supports added at a later time. If the supports are outside the container, however, they can be added only when they are needed.
  • Location: Your vegetables will require at least 6 hours of direct sun a day. If this is not possible you may try placing your pots on dollies or carts and moving them to a sunnier location as the sun moves throughout the day. Note that good air circulation is important for disease control.
  • Watering: Test soil frequently for water to make sure that you keep it evenly moist. Water the soil, not the plants, to avoid the spread of disease. Check soil moisture more frequently during the summer months when evaporation is faster. Mulching your containers with salt hay or grass clippings will help keep soil cool during the summer months and reduce the frequency of watering. If possible, a drip system can be a great option for keeping containers watered.
  • Fertilization: Fertilizer leaches through pots quickly. Fertilize containerized vegetables at least once a week with a water soluble fertilizer. Always be careful to follow the directions on the fertilizer package and follow the recommended rate. Too much fertilizer may burn or kill your plants, but too little will result in undernourished, underperforming plants.

With appropriate care that caters to the needs of containers, your small-scale vegetable garden can be just as lush and productive as any larger, more intensive space, and you’ll soon have a bountiful harvest to enjoy.
Tremendous Turf

The benefits of turf grass as a ground cover are numerous and often undeclared or overlooked. In recent years, turf has gotten a bad reputation due to the belief that a beautiful lawn requires a lot of hard work and overuse of dangerous chemicals. This is a misconception and the benefits of turf can far outweigh the concerns, particularly when you care for your turf properly and responsibly.

The following is a list of the many advantages that our lawns provide. This list was provided by and may be found, along with other helpful turf information, at www.TheLawnInstitute.org.

Environmental Benefits

  • Cools the Air
  • Produces Oxygen
  • Filters Air & Reduces Pollution
  • Captures & Suppresses Dust
  • Recharges & Filters Groundwater Supply
  • Reduces Storm Water Runoff
  • Controls Soil Erosion
  • Retains and Sequesters Carbon
  • Assists Decomposition of Pollutants
  • Restores Soil Quality

Community & Human Health Benefits

  • Enhances Community Pride & Social Harmony
  • Offers a Natural Playing Surface for Recreation
  • Provides a Safe Surface & Reduces Injuries
  • Promotes Outdoor Activity & Exercise
  • Improves Physical & Mental Health
  • Relieves Stress
  • Lowers Allergy-Related Problems
  • Dissipates Heat & Cools the Environment
  • Reduces Glare
  • Diminishes Noise Pollution
  • Minimizes Nuisance Pests
  • Compliments Overall Landscaping
  • Preserves Natural Wildlife Habitat

Economic Benefits

  • Increases Property Values
  • Reduces Home Cooling Costs
  • Provides a Low-Cost Ground Cover
  • Serves as a Fire Barrier
  • Improves Visibility & Deters Crime
  • Boosts Human Productivity

With so many benefits to healthy, luxurious turf, won’t you give your lawn another chance? We can help – from suggestions for revitalizing a weak lawn to proper mowing tips to fighting weeds and pests, plus all the tools, seed, fertilizers and amendments you need to improve your lawn – our experts can help you make the most of every square inch of your turf!

Dividing Hybrid Hellebores

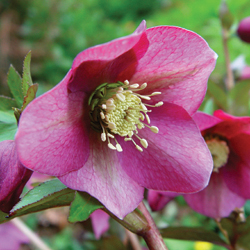
Hybrid hellebores bring us all sorts of happiness. These are one of the first plants to bloom in the late winter and early spring and are available in flower colors of chartreuse, cream, white, pink, red and deep purple. Hybrid hellebores are also those rare and treasured perennials that provide year-round interest, giving you the most bang for your buck and brightening your landscape in every season. As evergreens, they never lose their luster, and their flower shapes and textures are quite varied for even more interest, with a cultivar to suit any gardener’s taste. What’s not to be happy about?

A Love Divided

To keep these plants healthy and thriving, and to increase your quantity, division is a necessity. It is important to divide these plants carefully, however, or else you risk sadness with fewer blooms, lopsided plants or even losing these gems. Fortunately, it’s possible for even a novice hellebore lover to divide their plants with confidence.

  1. Divide hybrid hellebores in the spring when it is in bloom. This will also let you see how the blooms are positioned on the plant so you can divide shapes appropriately.
  2. Choose a plant that has at least 5 flower stems. Each one represents a division and will give you great new plants to bloom.
  3. Dig your hellebores up with a garden spade by inserting it deeply into the soil around the perimeter of the plant about 6 inches away from the outer stems of the clump. This will keep the root system largely intact and uninjured.
  4. Lift the clump and shake off loose soil or any trapped rocks or ensnared mulch. You can gently loosen clumps with your fingers, but take care not to damage the roots.
  5. With a garden hose, wash away any additional soil from the clump so the plant roots are exposed. This will help them get established in their new location more quickly.
  6. Divide the clump by cutting through the roots with a heavy-duty serrated knife. Make your root cuts where you see obvious natural divisions between the flower stalks.
  7. Replant your divisions at their original depth, in a shady location. Include plenty of compost in the planting hole for good nourishment. Water well and continue to keep soil from drying out until your new plants are well established.

Before you know it, you’ll have many more hybrid hellebores to enjoy! If you have a few too many, be sure to share the happiness by giving them to family members, friends, neighbors and anyone else who can fall in love with these beauties.

Helleborus orientalis

Trackable Tools

It’s the beginning of a new gardening season. Hopefully you took out last year’s journal in January or February and reviewed your notes on what you wanted to change, improve, experiment with or eliminate from your garden and landscape. Now is the time to begin implementing some of those great ideas, and it starts with having the right tools.

Where Do Your Tools Go?

One common problem in the garden is misplaced tools. We’ve all found hand tools in the spring that were inadvertently thrown in the compost pile or left under a shrub during fall cleanup. Many of us have spent time we didn’t have to spare walking in circles, looking for the shovel that we just had in our hand. It was laid down for a moment and seemed to disappear. Tools can easily disappear on a crowded workbench or in a cluttered shed, or they may even end up in a brush pile or other unlikely location.

When tools are lost, not only are our gardening chores impacted, but the tools can be damaged by exposure or accidental damage if they’re dropped, run over with a mower or otherwise subjected to inadvertent abuse. This can mean we no longer have the tool we need when we need it most, and we have to make a trip to the garden center to replace a tool – using time and money our gardening budget may not have.

Finding Your Tools

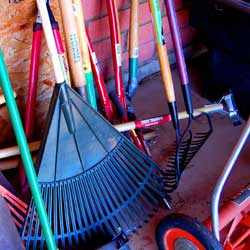
Let’s do things differently this year. Let’s save time, money and our precious tools. Resolve to only buy new hand tools with bright colored handles that are easily seen from afar and stand out to be picked up after a long day in the garden. If you already have a good selection of tools that you love and wish to keep track of, simply cover the handle with a bright colored spray paint on a sunny spring day, or wrap the handles with brightly colored tape or other coverings to make them more visible.

Similarly, take the time to clean out and declutter your garden shed, tool boxes and workbenches, making sure there is a safe, appropriate place to store every tool. If each tool has a place, you’ll be able to see at a glance when a tool may be missing and you can find it quickly before you’ve forgotten where you saw or used it last.

You and your garden will be glad you did!

trackable_tools_1

Peach Leaf Curl

If you grow peaches, you have most likely experienced peach leaf curl. Recognizing the symptoms of this infection and understanding what to do about it can help you keep your peach crop peachy keen.

About Peach Leaf Curl

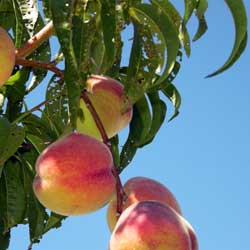
Peach leaf curl (Taphrina deformas) is a fungal disease that infects the immature leaves of peach and nectarine trees and it is often far worse in years with a cool and rainy spring, conditions that allow this fungus to spread more rapidly. The yearly disease cycle begins at bud swell and continues until the young leaves emerge. The infected leaves turn reddish-brown, pucker, shrivel and fall off the tree. With fewer leaves, the fruit crop is not nourished as well and fruit will be smaller and less productive. On rare occasions, the fruit itself may become infected and will show a scabbed, corky surface in patches.

After the initial infection, the velvety spores are carried by the wind and rain, overwintering in the tree bark to infect the tree again the following spring. Repeated infections will lead to branch die back and eventually shorten the life of the entire tree.

Stopping Peach Leaf Curl

If you are considering growing peaches, choose a leaf curl resistant variety of tree. There are both new resistant varieties as well as resistant heirlooms. If you are already growing peaches, keep your tree healthy with proper and regular pruning that will allow adequate air circulation and sunlight between branches to minimize the damp, cool conditions that help this fungus. Proper feeding and watering of your tree will also help it be more disease-resistant.

If the disease presents itself, apply fungicide every year in the fall after the leaves have dropped. In areas with wet winters, it can be helpful to reapply fungicide in early spring before bud swell. Always rake up and destroy the infected fallen leaves. Safer recommended controls include sulfur and copper-based fungicides. Traditional control products include Daconil and Ferbam, and should be used according to the application instructions. If the infection is localized to just a few branches, it may also be possible to prune away those infected branches in late fall to help minimize the spread of the spores.

Peach leaf curl can be devastating to your peach trees, but if you recognize the disease quickly and take proper steps to minimize its effects, you can keep your trees healthy and protect your crop of sweet, delicious peaches.

peach_leaf

Heath or Heather

Often mistaken for one another, heath (Erica) and heather (Calluna) look amazingly similar. To confuse things further, heath is frequently referred to as “spring heather” and some landscapers, garden centers and nurseries may use the names interchangeably. Both types of plants belong to the Ericaceae family, and they share many similarities.

Which is Which?

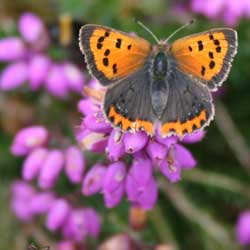
The key difference between these two popular landscaping plants is that heath blooms from winter to early spring while heather blooms from mid-summer to early fall. Heath features slim, needle-like foliage, while heather’s foliage is flatter and more scale-like. Heath generally only grows to 12 inches tall, while different heather cultivars can range from 8-20 inches tall. With their many similarities for location, soil type and sunlight, however, it is easy to grow these two shrubs together for a much longer and more brilliant flowering season.

Heath and Heather in the Landscape

Both heath and heather are low maintenance, low growing, perennial shrubs that love well-drained, acidic soil, but do not plant them too deeply or their shallow root systems may rot or smother. Heath, or spring heather, has tiny, urn shaped flowers in white, rose or fuchsia and is readily available in early spring. Heather will be more popular later in the season and into early summer, and its bell-like mauve, rose or lavender flowers provide lovely color to the landscape later in the season. Depending on the cultivar, heather’s foliage can range from bright green to golden yellow, reddish or even silvery-gray.

Both plants should be watered well, and mulching around the shrubs will help inhibit weeds and conserve moisture without overwatering. Pruning should be done just after blooming is finished to maintain and shape the plant mounds and discourage overgrowth and legginess.

Heath and heather look terrific planted en masse on a sunny hillside or in the shrub border with other acid-loving plants like azaleas and rhododendrons. They are a welcome addition to the rock garden and can brighten up a dwarf conifer grouping or container garden. Their mounding habit makes the plants easily spill over edges for a naturalized, graceful organic look ideal for cottage gardens and flowing landscape design.

It is important to note, however, that deer can be very attracted to both heath and heather. If these backyard visitors are a problem in your garden or pester your landscape, you may want to take a variety of steps to keep them away from your beautiful shrubs.

Planted together, heath and heather will provide you with a succession of dainty blooms to take you through the entire growing season.

Heatherheath

Hurry Up the Harvest — Ways to Extend the Growing Season

Have a hankering for homegrown tomatoes? Eager to see the signs of ripening in your garden without waiting weeks and weeks? Even though it’s early spring, you can extend the growing season and hurry up your harvest by trying some of these tips and products:

  • Gain three weeks on the growing season by pre-warming the soil with Weed Shield, a black, porous plastic landscape fabric. Weed shield can be laid over your prepared garden soil and secured with landscape pins. Allow at least five days of sunny weather to warm the soil. Once the soil has warmed, cut X’s in the plastic and plant through them, keeping the edges of the fabric over seed holes or against seedlings to continue warming. As the season progresses and the air and the soil temperatures increase, remove Weed Shield and replace it with salt hay. Be mindful that if you plant seedlings, you may need to take additional steps to protect the delicate shoots and leaves above the soil as well.
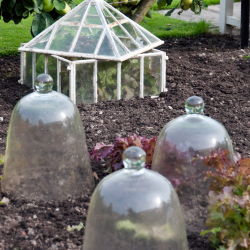
  • Warm the soil around your plants with floating row covers (Plant & Seed Blanket or remay fabric) or cloches (mini greenhouses). Lay remay fabric over your newly planted seedlings to hold in the heat. Anchor with landscape pins to guard against unwanted chilly breezes. Remember to pin the blanket loosely so the plants have room to grow – or use hoops if preferred. Cloches like the Wall O’ Water store the heat in plastic tubes of water that absorb heat from the sun in the day and radiate it back to plants at night. This will protect plants to temperatures as low as 19 degrees. Hot caps can also be placed over plants to hold in warm air.
  • Cold frames can be used to warm the soil, grow plants as in a mini greenhouse or protect plants like a large cloche. They’re also good for transitioning seedlings you’ve started indoors until they are ready to be planted directly into the garden. This is called ‘hardening off’ seedlings. When using this technique, place your cold frame near the wall of a heated building if possible to take advantage of heat radiation. Manure may be used to warm the soil. If warming the soil, place the cold frame in the garden 10 days before you want to plant. Orient the frame so it runs east to west so more sun will reach the plants. Then, plant directly into the frame. Remove the cold frame when temperatures are no longer a threat to young plants. In all situations, be sure to vent the cold frame to keep it from getting too hot and be sure to water with water that’s at least as warm as the soil.
  • Automator Tomato Trays are 12” square black plastic trays that will warm the soil around your vegetable plants. These trays have attached spikes to anchor them into the ground and holes in the plastic that allow water and oxygen to reach the roots of your plants. Because the Automator Tomato Trays cover such a small area around the plant, they may be left in place all season without difficulty.

With these different options, there are always ways to get a head start on your gardening this spring!

harvest_3

harvest_4

A Feast for the Eyes

Traditionally, when planning a vegetable garden, the focus has been primarily on function with aesthetics as an afterthought – a productive harvest has usually been more important than any visual appeal. This year, why not try a new approach? Thoughtfully combine beauty and performance to create an edible garden that will explode with a variety of color and an abundance of produce. It can truly be a feast for the eyes as well as the table!

Planning a Beautiful Vegetable Garden

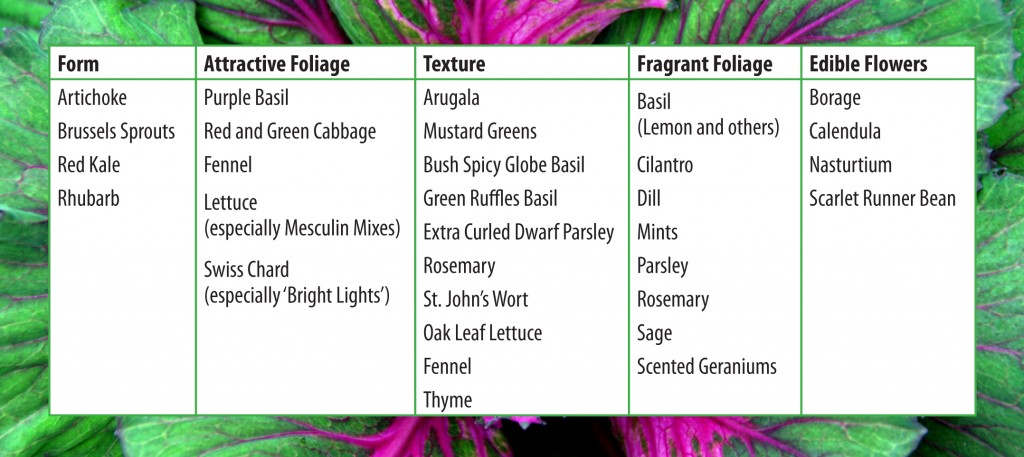
Color, texture and form are characteristics we keep in mind when combining plants in the flower garden. We plan flowerbeds so that plants enhance each other, repeating colors and shapes for continuity and flow. We add a variety of texture and form for diversity and interest. Vegetables, herbs and fruits can be just as vibrant, exciting, diverse and easy to combine as annual and perennial flowering plants are.

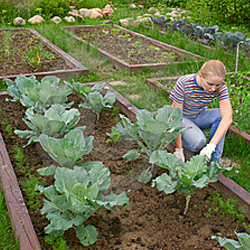
To begin, provide structure. Placing a picket fence around your garden offers instant structure and visually sets it apart from the rest of the landscape. If you plan on planting along the outside of the perimeter, you will create the allure of a garden within a garden, with a hint of secret places. Place a straight pathway through the center, starting at the entrance. Divide the larger garden into smaller square planting beds using pathways to separate the beds. This will enhance the structure of, and provide easy access to, the garden beds as well as lead your eye through the garden. If desired, you can also used raised beds for this formal structure.

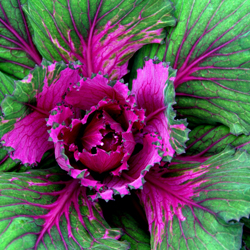
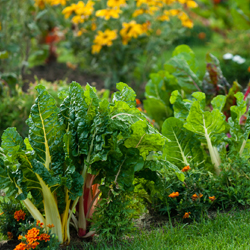
Next, focus on plant selection. Begin with a plant plan or layout. Initially, base your selections on what is pleasing to your individual tastes. Consider unusual varieties of vegetables and herbs that come in unique colors. Repeat colors, both horizontally and vertically, to add depth and dimension to the garden. Don’t forget to add brightly flowering annuals such as zinnias and marigolds to mingle amongst the edibles. Another consideration is edible flowers like nasturtium and calendula. Contrast colors for a striking, eye-catching effect. Keep in mind, also, texture and form. Bold textures add drama and are often combined with fine-foliaged plants for a softening contrast. Short, stout plants anchor the garden bed while tall, willowy plants raise the eye and lead you farther down the garden path. Take all these characteristics into account when planning and place plants in geometric patterns to create a quilt-like garden tapestry.

Finally, your spring edible garden will emerge invoking a feeling of calm, displaying a variety of cool greens, purples and blues found in peas, lettuce, cabbage and broccoli. Shortly after, the summer edible garden will be completely transformed at harvest time with an explosion of vibrant shades of red, purple, orange and yellow. With so many stunning options to combine, you can truly create a feast for the eyes that will be beautiful in every season!

EdiblePlants-1024x457

Feast-2Feast-3

Feast-1

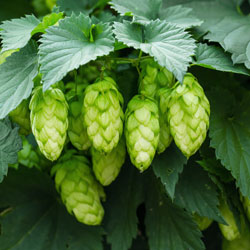
Hops for the Home Garden

Brewing your own beer is a popular hobby and great fun for any brew aficionado, but for the very best results, you need the finest, freshest ingredients. What better way to be sure of the quality of your hops than to grow your own right in your home garden? It’s easier than you may think!

Choosing Which Hops to Grow

There are more than 120 varieties of hops available. To choose which type is best to grow at home, you first must consider your climate, soil type, sunlight levels and other factors that influence any plant in your garden. Once you know which hops are best for your region, consider the individual types and whether they are favored for bittering elements, aromatic qualities, overall flavor or just as decorative plantings.

Not sure which types of hops you ought to choose? Visit your local nursery for a consultation, or contact a local home brewing group to connect with other home hops gardeners and learn more about the choices that work best for your area.

Planting Hops

All types of hops require well-drained soil and a spot in full sun to grow their very best. These plants tend to prefer soil with a pH ranging from 6-7.5 – purchase a soil test kit to learn your garden’s pH so you can add suitable amendments if needed to adjust the pH. You should also position hops where they can get adequate vertical support, since these climbing plants can reach 5-15 feet or taller, depending on the variety, and some hops will grow as high as 30 feet. They will need a strong, sturdy trellis, pole or other structure to support their growth and mature weight. In smaller yards or where vertical spaces aren’t practical, you can create a horizontal trellis to use after 8-10 feet of growth, and the plants can be easily trained to grow along the horizontal supports. Tall pulley systems can also help you grow taller hops varieties with ease.

Once you are ready to plant your hops, choose only firm rhizomes that don’t show signs of bruising, rot or mildew. Your local nursery may have several types of rhizomes to choose from, or you can contact other local brewers about swapping or purchasing different rhizomes for a variety of hops.

Caring for Home Hops

Because these plants are vigorous growers, a good fertilizer high in nitrogen will help promote leafy growth so they can thrive. As hops grow, they are also very thirsty and will require abundant water, but do not leave them soaking in puddles that will rot the roots. A drip system or soaker hose is best for watering hops consistently but without wetting the foliage, which can lead to foliar disease. Hops are particularly prone to downy and powdery mildew infestations. Trimming the lowest leaves will promote better air circulation and reduce the risk of mildew, and applying appropriate fungicides as needed may also be useful.

While it is normal for the top portion of a hops plant to die off after the harvest, keep a close watch for any diseased shoots and prune them away immediately to prevent any infections from spreading. Keep your tools well-sharpened for clean cuts, and sterilize tools regularly to avoid any cross contamination of different pathogens.

Ready for the Harvest

It may be 2-3 years before a new hops plant has grown enough to provide an abundant crop, but in time even a single plant can be a bountiful producer. When the cones have turned a rich, golden color and exude a pungent aroma, they are ready to harvest. Another clue is the texture – a ripe cone will have a dry, papery texture, and will be somewhat firm but spongy, returning to its original shape when gently squeezed. If the cone is mushy or the odor is rancid, the cone is overripe. Fortunately, because of the size of these plants, their cones ripen at different rates, and an ongoing harvest cycle is best to pick the cones at the peak of their ripeness.

After harvest, hops can be used when they are fresh, or you can dry them for later brews. Experiment with different options to find which choice you like best, and you’ll be surprised at the difference in flavor and quality your own homegrown hops can make for all your favorite brews.

Creating a Meditation Space in Your Garden

Gardening can be a relaxing, therapeutic hobby as you nurture seedlings, encourage growth and bring your harvest to fruition. But if you just want to take a moment to breathe, reflect and center yourself, it isn’t necessary to get out the garden clogs, sharpen your hand tools or get dirt under your fingernails. Creating a peaceful meditation space in your garden is easy, and can turn any garden into your own private sanctuary.

The Need for Peace

As our lives get ever busier with hectic schedules and cramped appointments, it may seem impossible to have any time for thoughtful reflection or meditation. Furthermore, smaller living spaces and more crowded urban areas can make it seem equally impossible to have any space for solitary peace. Without the ability to relax, we’re faced with skyrocketing stress in our lives, along with a host of different health problems such as tension headaches, high blood pressure, depression, obesity and more. More and more studies, however, are demonstrating that time spent in nature is beneficial for reducing stress and tension, and there’s no better place to easily enjoy nature than in your own garden.

Your Peaceful Purpose

Before creating your meditation space, you need to plan what you want to use it for in order to ensure you have enough room and all the right touches for your peaceful retreat. Meditation can mean something different to everyone – you might prefer a place for quiet, contemplative prayer, or you could be interested in an outdoor space for yoga practice. For some people, a restful space for coloring or painting is their ideal meditation spot, while others may want a natural niche for reading or journaling. Creating or listening to music may be part of your meditation practice, or even a cozy spot for an outdoor nap. Whatever means peace and relaxation to you, it can be incorporated into your garden.

Eliminating Distractions

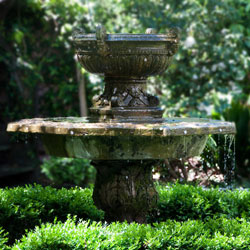
Once you know how you will use a meditation space in your garden, it is essential to eliminate other distractions and interruptions from that space. Unwanted noises, glaring streetlights, unsavory sights and even unpleasant smells can interrupt meditation and disrupt your relaxation, but it is easy to plan your gardening to eliminate those difficulties. For example, a green wall or trellis can be used to block an unsightly view, and the plants on it will help muffle noises. You could also consider a small fountain for the soothing tinkle of running water to block traffic or neighborhood noises. Climbing, clinging vines can be used to cover structures with greenery to increase the natural feel of the space. Opt for arbors or pergolas that can help create comfortable shade and define the space without completely blocking sunlight, and consider fragrant flowers nearby if unwanted aromas are invading your garden.

Adding Joy to Your Garden Space

Once your meditation area is structured and distractions are minimized, it is time to add your own personal joy into the space. What brings joy to the space will vary from garden to garden and even from season to season, but it should be a personal choice and something that helps draw you into the space. Consider…

  • Seating
    In order to enjoy your meditation space, you will need a place to sit and relax within it. This may be a comfortable bench, a cozy chaise lounge, a soothing hammock or any other type of seating. A chair-sized boulder can be a natural alternative, or you may opt for a more whimsical swing to add a dash of fun to your personal space.
  • Sights
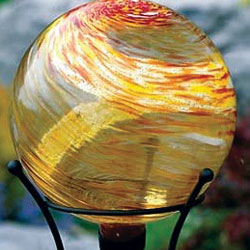
    You’ve taken steps to block sights you don’t want to see in your garden, but a good meditation space will also include sights you want to look at. A bird feeder or bird bath can invite beautiful feathered friends to share your space, or you might prefer a lovely piece of garden art, a gazing ball, plants in your favorite colors or even unique mulch or paving stones in a therapeutic pattern.
  • Sounds
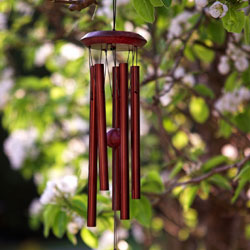
    Pleasant sounds can help add a focal point to your meditation space, allowing you to focus on unique tones to help center yourself. A wind chime, waterfall fountain or even a way to bring your favorite music outdoors can be a wonderful addition to a peaceful meditation space.
  • Water
    Water can serve several purposes in a meditation space. Flowing or splashing water provides natural white noise, and the sparkles of the water are ideal for meditative gazing or creating soothing reflections. Consider different aquatic options, such as a small stream or brook, a weeping rock, a fountain or even a reflecting pool. You can even opt for a small pond for goldfish or koi if you desire.

Above all, remember that there are no strict rules for creating your personal meditation space. Whatever brings you peace and joy can be part of your design, and it can change as your tastes and preferences change. Garden meditation spaces can vary as much as any other part of the garden, but each one helps nurture our green spirits.