Monthly Archives: September 2021

Autumn: Why Plant Now?

Although many gardeners plant trees and shrubs in the spring, knowledgeable gardeners plant in the fall to take advantage of all this fabulous season has to offer. But why is fall planting better than spring planting?

  • Stress Reduction
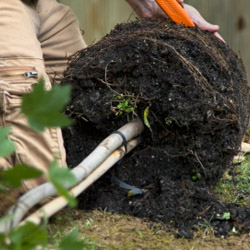
    Transplanting causes stress as plants are removed from containers, balls or established locations and changed to new locations. Planting in the fall, when a plant is entering dormancy and is generally hardier and sturdier, reduces this stress so the plant can thrive.
  • Establishing Strong Roots
    Fall planting “establishes” trees and shrubs by encouraging root growth. Because the soil is still warm, the roots continue to develop until freezing, though the upper parts of the plant are already dormant. When transplanting in the spring, the developed roots are active and delicate tips or rootlets, as well as buds and new leaves, are more easily damaged.
  • Weather Resiliency
    Trees and shrubs planted in the fall are better able to withstand the rigors of the next summer’s heat and dry conditions because they have much longer to develop healthy roots systems and become thoroughly established. This is especially critical in dry climates or areas prone to drought or irregular rainfall.
  • Faster Maturity
    The “head-start” of fall planting results in a larger plant in less time, helping create a mature landscape without waiting for smaller plants to catch up. This can be especially critical when replacing dead or damaged plants in a mature landscape to avoid a gap or uneven look.
  • Water Conservation
    Planting in the fall saves watering time and promotes conservation by eliminating daily watering. Cooler temperatures with the addition of both morning and evening dew contribute greatly to soil moisture availability in fall without as much supplemental watering.
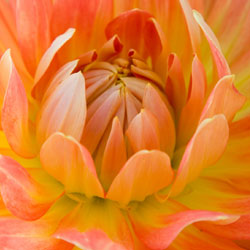
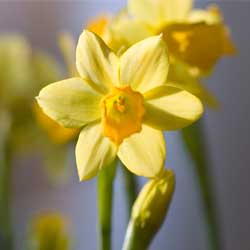
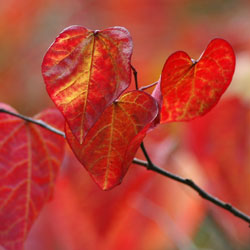
  • Color Confirmation
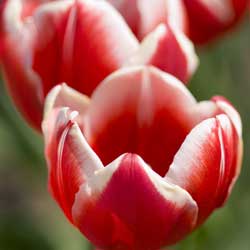
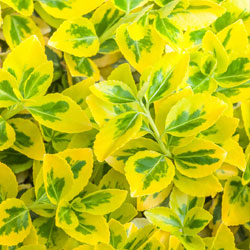
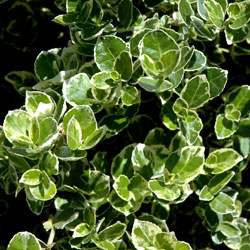
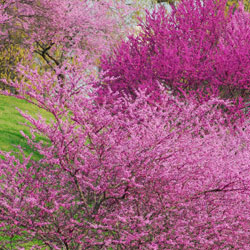
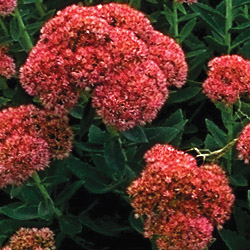
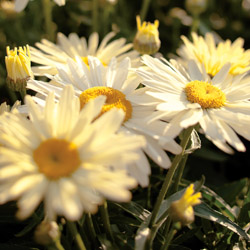
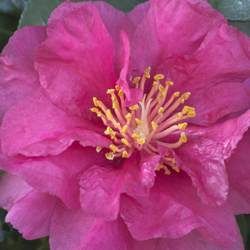
    Fall is the best time to see a plant’s autumnal color. Planting in the fall eliminates the surprise of the wrong color or unexpected shades that may not coordinate with nearby plants. By planting in autumn, you’ll know exactly what you’re purchasing and planting, and you will be able to match better with your existing landscape.
  • Saving Money
    Last but definitely not least, buying your beautiful trees and shrubs in autumn can save big money. We discount prices on trees and shrubs to create room for holiday season materials and pass the savings on to you. Selection may be more limited later in fall, however, so don’t wait too long to take advantage of great savings.

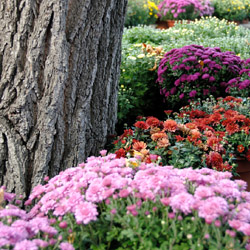
Autumn can be the ideal time to plant trees and shrubs, whether you are adding to your landscape, replacing plants or starting a whole new look. If you plant in autumn, you’ll be amazed at how lovely your landscape will look next spring.

AutumnWhyPlant_2

AutumnWhyPlant_3

Deterring Deer

Deer may be beautiful and elegant, but they aren’t always welcome in the garden. Even just a few visiting deer can tear up a landscape, eat an entire crop, destroy a carefully cultivated bed and cause other havoc, such as creating a traffic hazard, damaging bird feeders or leaving behind unwanted “gifts” on sidewalks and pathways. But how can you keep deer out of your yard and away from your garden and landscape?

Popular Deer Deterrent Techniques

People try all sorts of home-grown methods to keep deer from destroying their landscape and gardens. Some of the more common tactics include…

  • 8 ft. fencing, including wire or electric fences
  • Big, loud dogs on guard in the yard
  • Deer repellents such as commercial chemicals
  • Predator urine or other anti-deer scents
  • Motion detectors connected to lights or sprinklers

All of these methods work but are limited in their effectiveness. Fencing is costly and unsightly. Repellents and urine wash away. Sprinklers or lighted areas can be easily avoided. So what can you do to keep deer away permanently?

Deer are creatures of habit and they are easily scared. Anything you can do to mix up their habits or make them think there is danger nearby might be enough to make them go elsewhere in search of food. But deer aren’t foolish and if they realize the danger isn’t real, they will return. Therefore, you must rotate any scare tactics you try and reapply repellents frequently. This can be a lot of work to keep your garden safe, but you can make your garden do the work for you.

Plants Deer Won’t Like

While deer in large herds with insufficient food will eat almost any garden vegetation, particularly in harsh winters, you can opt for plants that aren’t popular with deer to minimize deer damage. At the same time, avoid planting favorite deer plants, such as azaleas, rhododendrons, yews, roses, Japanese maples, winged euonymous, hemlocks and arborvitae, as well as any edible garden produce.

So what can you plant in your landscape to discourage deer? There are many attractive plants deer will avoid, including…

Trees

  • Chinese Paper Birch
  • Colorado Blue Spruce
  • Dragon Lady Holly
  • Douglas Fir
  • Japanese Cedar
  • San Jose Holly
  • Serviceberry
  • Scotch Pine

Shrubs & Climbers

  • Barberry
  • Bearberry
  • Blueberry Elder
  • Boxwood
  • Caryopteris
  • Common Buckhorn
  • Creeping Wintergreen
  • European Privet
  • Japanese Andromeda
  • Japanese Plum Yew
  • Leucothoe
  • Rose of Sharon
  • Russian Olive

Try using these less deer-friendly plants to create a dense border around your yard and garden area, and deer will be less inclined to work their way toward the tastier plants. When combined with other deterrent techniques, it is possible to have a stunning landscape without being stunned by deer damage.


deer_1

Bulbs: Increasing Your Yield

When you visit our garden center, you’ll find an incredible variety of autumn “bulbs.” Although they may look strange at this time of year, these “ugly ducklings” will become beautiful swans in your spring garden. It’s hard to imagine how these odd lumps can grow underground and become so gorgeous, but if you plant them now you will enjoy an incredible floral display next spring and summer.

How Bulbs Grow and Multiply

Did you know many bulbs will increase in quantity over time? Most gardeners simply divide their bulbs after a few years and move them to other parts of the garden or give extras away to friends. Dividing your yield is easy when you identify what type of bulb you are dealing with.

There are five distinct types of “bulbs” and although not all of these are available in the fall and some are not winter hardy, it is important to mention them to be able to understand their differences.

BULB TYPE

EXAMPLES

DESCRIPTION

HOW TO DIVIDE (after digging up)

Rhizome

Begonia, Calla, Canna, Ginger, Iris, Lily of the Valley, Tuberose


Grows horizontally from the pointed ends. As this bulb matures, it branches and develops other pointed growing ends. Roots grow from the bottom. Cut the rhizome into sections and ensure each piece has at least one pointed growing tip.
Tuber Anemone, Caladium, Cyclamen, Potato, Tuberous Begonia Buds and roots form anywhere on the surface. Tuber continues to enlarge with more eyes and roots. No basal plate or growing point. Cut the tuber into sections with at least one growing bud and root on each section
Tuberous Roots

Clivia, Dahlia, Daylily, Liatris, Sweet Potato


Actually a swollen root, new tuberous roots grow in a cluster from the base of the plant’s old stem or central crown. Divide the root cluster so each division includes roots and one or more growth buds from the stem base.
True Bulb Allium, Hyacinth, Lily, Daffodils, Snowdrops, Tulips Roundish shape with a pointed tip, covered with scales, and has flattened base plate where roots form. May have a papery outer skin. Forms little bulbs, “offsets” at base. Separate small offsets and plant individually.
Corm

Crocosmia, Crocus, Freesia, Gladiolus


Similar in shape to true bulb however there are no scales. Covered by a “tunic” of fibers. A corm decomposes each year; a new corm develops on top with smaller corms (cormels) on the sides or along the base plate. Separate new corms from smaller corms and plant individually.

Using Your Divided Bulbs

Once you’ve successfully divided your bulbs and bulb-like flowers, what do you do with your extra bulbs? There are many great options…

  • Transplant them into different parts of your yard to create a uniform, coordinated landscape with similar plants.
  • Give them away to neighbors, family members, friends, coworkers or anyone who would like to add new flowers to their yard.
  • Donate them to churches, schools, parks, senior centers or other places where extra flowers for landscaping will be appreciated.

As your bulbs continue to multiply, you will enjoy having more and more to choose from to create your ideal colorful, fantastic floral landscape.

bulbs_4bulbs_1bulbs_2 

Versatile Euonymus

What are your garden’s trouble spots? Do you need an evergreen hedge? A tall anchor plant at the back of a deep garden bed? How about an interesting groundcover? Perhaps your garden needs a medium-sized transition plant. Try a euonymus! This versatile plant does it all, and whatever your landscape needs, this family of plants probably includes your solution. Some are deciduous while others are evergreen, but all are easy to grow and adapt well to a variety of environments.

About Euonymus

With more than 175 varieties of Euonymus available, there is sure to be one to meet your landscaping needs and climate conditions. Evergreen types tend to prefer somewhat sheltered locations, while deciduous euonymus will thrive in full or part sun. Watering should be regular, with more frequent watering (1-2 times per week) in very dry conditions. Well-drained soil is best to prevent root-rot and while richer soil is ideal, euonymus can adapt to nearly any soil type. Pruning can help keep these shrubs compact and neat, and if left unchecked they may outgrow spaces and variegated leaves could revert to plain colors.

Euonymus Varieties in Autumn

In the fall, the burning bright colors of a deciduous euonymus are unmistakable and add rich autumn foliage to the landscape. The strawberry bush (E. americanus) burns bright yellow with scarlet red fruits with orange seeds. The spindle tree, (E. europaeus) has more red in its fall color and the berries are pink or red with white seeds. Probably one of the best known is the Winged Euonymus (E. alatus), often used as a deciduous screen, with unique “winged” twigs and bright red fall color. Choose from a number of different varieties with unique colors and varying mature heights.

The many members of E. japonicus provide solutions for evergreen hedges, edging plants and intermediate-sized shrubs. They range from 1-12′ tall. Some are green, while others have variegated yellow or silver leaf edges. Popular ‘Green Spire’ grows to 7′ tall but at only 1-2′ wide, it creates a narrow and easily maintained taller hedge ideal for screens and privacy. ‘Silver Princess’ grows only 3′ high and wide creates a beautiful silver-tinged border or is a great option for terraces or small bed areas.

For groundcovers, check out the prostrate varieties of E. fortunei such as ‘Coloratus’ (Purple-Leaf Winter Creeper) which turns dark purple in the fall or ‘Wolong Ghost’ with dark green leaves with white veins. There is even a dwarf groundcover, E. fortunei ‘Minimus’ which grows less than 6″ high!

Remember, many of these euonymus varieties add autumn beauty to your garden, so this is an excellent time to see them at their peak and choose which of these unique and stunning plants should be part of your landscape.

euonyms_1

euonyms_2

Redbud Revelry

Gardeners love the Eastern redbud tree (Cercis canadensis). Native to North America, these hardy, slow-growing, small trees richly deserve their places front and center in the landscape. They flower very early in the spring (as early as April), provide beautiful fall color, remain reasonably small, are low maintenance and create quite a display when planted in groupings or as a single specimen. They even grow well in parking lots, sidewalk strips and in containers, making them ultimately versatile for all types of landscaping plans. What else could you ask for?

New and Exciting Redbud Varieties

As if the classic eastern redbud wasn’t beautiful enough, there are always new varieties that give these stunning trees even more charm and character. Which one will be the centerpiece of your landscape?

Recent introductions include ‘Lavender Twist’, which grows in an elegant weeping form, and the compact ‘Ace of Hearts’, which excels in a small garden or container as a blooming, dome-shaped, focal point. ‘Alba’ flowers in pure white and ‘Appalachian Red’ blooms with deep burgundy pink flowers. The leaves of ‘Hearts of Gold’ open red in the spring and slowly change to gold.

‘Rising Sun’ redbud, another new introduction, stops most people in their tracks. In spring, before leaves appear, lavender-pink pea-like flowers cover the trunk and branches. The show really starts when the leaves open and the heart-shaped, deep-apricot colored leaves transition through orange, yellow and gold to lime-green with all colors showing at the same time. In fall, the tree shimmers in shades of gold. Amazing!

Growing Your Redbud

No matter which type of redbud you choose, you’ll want to take good care of it to be sure it reaches its full beauty. First, be sure to plant your redbud in an area where it can stretch to its full size and show off the unique branching growth habit. You will also want to choose a position where the redbud won’t be crowded or overshadowed by other plants. These trees prefer at least four hours of direct, unfiltered sunlight each day, so full or partial sun positioning is best. These are hardy trees and grow well in most soil types, but adding organic material to the soil and mulching around the tree is always a wise idea to protect and nurture it.

Whether planted as a specimen, en masse, or in a container, we’re sure you’ll agree these little trees deserve consideration for a special place in your garden.

redbud_1 redbud_3

Entrance Way Evergreens

Cool and classic or chic and contemporary, no matter what your style, you’ll always be proud of an entrance flanked with beautiful containers highlighting just-right evergreens. In this case, “evergreen” doesn’t necessarily mean a conifer, either – many other shrubs remain green in the winter and can be beautiful showpieces welcoming guests to your home.

Planting Your Container

Entrance way evergreens are generally planted in containers and frame a doorway, walkway or arch. If you truly want your evergreens to take center stage, opt for more understated, neutral containers, but select shapes that match the architecture of your home. You can opt for a boldly colored container, but take care that the container’s decorations won’t overwhelm your evergreens.

You will want to use high quality potting soil for the container to provide adequate nutrition for your evergreens to thrive. Also pay careful attention to the moisture levels, watering the plants appropriately – containers often need more frequent watering than plants in your landscape. You can rotate the containers regularly to help the plants get even sun exposure, and regular fertilizing will help keep them healthy.

If you’re not sure how to plant a container, try this simple formula: “Use a thriller, filler and spiller.” Thriller refers to the tallest or showiest plant, the one that immediately catches the eye. The fillers are the plants surrounding the thriller that add more structure and bulk to the arrangement, filling in empty spaces. The spillers are plants to grow over, and soften, the edge of the container, giving it a more natural, organic look.

Here’s a listing of “thriller” plants to consider for your door decor. We can make recommendations of dwarf cultivars of many of these plants. Dwarfs will take longer to out-grow their container. Happy potting!

  • Shade
  • Azalea*
  • Boxwood
  • Camellia*
  • Evergreen Viburnum*
  • Japanese Andromeda*
  • Heavenly Bamboo*
  • Mountain Laurel*
  • Sun
  • Arborvitae
  • False Cypress
  • Juniper
  • Heavenly Bamboo*
  • Holly
  • Pine
  • Spruce
  • Yews
  • Yucca*


* These plants flower!

Accents for Your Entrance Evergreens

In addition to welcoming your visitors with a beautiful entrance, it’s easy to entertain them and show your style when you accessorize your evergreens. Festively dress your plants to coordinate with seasons or holidays. Fun and creative options include…

  • Spring: Small bunnies, silk spring blooms such as daffodils, pastel Easter eggs
  • Summer: Patriotic flags or ribbons for Memorial Day and the Fourth of July
  • Fall: Scarecrows, pumpkins, Indian corn, Halloween decorations
  • Winter: Holly sprigs, tiny twinkling lights, beaded garlands, snowflake ornaments

You can also personalize your entrance evergreens for birthdays, anniversaries or to showcase your favorite teams, colleges, hobbies and more. All are easy to do, fun, and affordable, and make your entrance truly eye-catching.

entrance_way_2entrance_way_1

Audition Some Autumn Bloomers

Extend the beauty of your garden with vivid autumn-blooming perennials. When you think of fall-blooming plants, don’t stop at mums – there are many perennials that can add color to your yard at this time of year.

Top Autumn Bloomers

While there are different autumn-blooming perennials for different growing zones and climate conditions, some of the most popular and widespread options include…

  • Fall Daisies
    For fall daisies (besides daisy mums!) grow Boltonia or Nippon Daisy. Boltonia is a tall (3-4′) grower, suitable as a background plant. White or pink daisies are borne in profusion atop fine grey-green foliage. The Nippon Daisy (Chrysanthemum nipponicum) is covered with large crisp white daisies in October. Both love lots of sun and make excellent cut flowers.
  • Autumn Sedums
    Bold-foliaged sedums provide texture as well as color in a sunny place. Sedum ‘Autumn Joy’ is the most well known. It has coppery-pink flower heads. Sedums ‘Brilliant’ and ‘Stardust’, with soft pink and white flowers respectively, are also attractive. For a totally different color combination plant sedum ‘Vera Jameson’. It has gray-purple foliage with rose pink blooms and looks stunning when planted with Blue Fescue, Artemesia Silver Mound and other silver-foliaged plants. As an added bonus, all the sedums are attractive to butterflies.
  • Autumn Asters
    Asters are another fall bloomer that butterflies love. These perennials like sun and moist, well-drained soil. There are many colorful aster varieties in shades of pink, purple, blue and white. Some favorites include tall-growing aster ‘Alma Potschke’ with bright pink flowers, blue-flowered aster ‘Professor Kippenburg’ and low-growing aster ‘Purple Dome’ with its deep purple blooms.
  • Autumn Goldenrod
    Sunny yellow goldenrod (Solidago) is another bright addition to the fall garden. Wrongly blamed as the cause of fall allergy problems, goldenrod has rightly taken its place in the fall garden. It looks particularly effective combined with blue flowering plumbago, purple asters and ornamental grasses.

Fall Bloomers for Shade Gardens

Even shade gardeners can enjoy late blooming perennials. Tall growing Japanese Anemones are a stately addition to the perennial garden. Bloom colors range from pure white to various shades of pink, and flowers can be single, semi-double or double blooms. Anemones grow well in light to moderate shade and spread quickly to form large clumps, filling in space vacated by spent summer plants. Turtlehead (Chelone) is another fast spreader for shade. Rose pink flowers cover the tops of the plant from early September to October. For a deeply shaded location, try Toad Lily (Tricyrtis), which has clusters of beautiful cream flowers, spotted with maroon along its upright stems. For light shade, plant Blue Cardinal Flower (Lobelia siphilitica), whose intense blue spikes can be admired from mid-August until frost.

No matter what type of garden you have, the end of summer does not need to mean the end of colorful blooms. Instead, just opt for amazing fall bloomers and enjoy brilliant color even longer!

Audition_3

Audition_2

Audition_1

King of the Cold: Ornamental Cabbage & Kale

Looking to add interest to the fall and winter landscape? This year, plant ornamental cabbage and kale for bold textures and vibrant colors.

About Ornamental Cabbage & Kale

Unlike most other annuals and perennials, these two hardy plants improve in appearance after a frost or two, which bring out more intense and brilliant colors in their foliage – perfect as an autumn accent or centerpiece plant. Identified by a number of names including floral kale, decorative kale, ornamental-leaved kale, flowering kale and flowering cabbage, ornamental cabbage and kale are classified as Brassica oleracca (Acephala group). Offering unlimited use in the landscape, these plants have large rosettes of gray-green foliage richly variegated with cream, white, pink, rose, red and purple. Kale leaves are frilly edged and sometimes deeply lobed.

While typical ornamental kale and cabbage varieties are easy to find, you can also try more unusual options, including dwarf varieties as well as upright, taller hybrids that can even be used in cut arrangements.

Using These Attractive Plants

Popular in borders, grouped in planting drifts, or planted in containers for the deck or patio, ornamental cabbage and kale typically grows to 12-18” high and wide, depending on the cultivar. Plant these specimens at least 12” apart in an area with full sun that has moist, well-drained soil. Organically rich soil with proper compost or fertilization is best to provide adequate nutrition for these lush plants. Although they are able to withstand light frosts and snowfalls, ornamental cabbage and kale will typically not survive hard freezes and are best treated as showy annuals.

The best foliage color will occur if ornamental cabbage and kale is planted in early fall as temperatures are cooling, or you can sow seeds 6-10 weeks before the first anticipated frost date – just be sure the seeds have sun exposure in order to germinate properly. These plants are usually attractive in the garden until Thanksgiving or slightly later, or in mild climates they may even last until spring temperatures begin to rise. Hint – when the plants smell like cooked cabbage, it is time to pull them out!

While these plants are superficially similar to the familiar cabbage and kale vegetables popular in salads and other edible uses, it is important to note that ornamental varieties are cultivated for color and shape rather than taste. Keep them out of the kitchen and in the garden instead, and you won’t be sorry!

KingofCold_1

Fall-Blooming Camellias

We love camellias! An Asian native and an old southern standby, they are now a favorite in the northern states as well. In recent years, new varieties have been developed for their increased cold hardiness, giving northern gardeners even more opportunities to enjoy these charming beauties. Blooming in October, November and even into early December, fall-blooming camellias provide an abundance of colorful showy blooms that can now be enjoyed in colder climates.

Camellias do best in rich, moist, well-drained, acidic (5.5-6.5 pH) soil. Plant camellias in a location where they will be protected from the drying winter sun and wind or else the delicate blooms may suffer. Because these shrubs are shallow-rooted, they should be planted no deeper than they are planted in the pot that you purchase them in. Apply 3-4 inches of mulch to the root zone to keep soil moist and control weeds. Compost added to the soil can also help provide suitable nutrition to keep these plants healthy. Water camellias first when newly planted and frequently during times of low rainfall – a drip system can be a great option to keep these shrubs suitably moist. Fertilize in the spring with a fertilizer specified for acid-loving plants. If purchasing and planting camellias in the fall, be sure to give them a little extra TLC to help them through their first couple of winters and they will reward you with their beauty for years to come.

To help you choose the most beautiful fall-blooming camellias for your landscape, consider these attractive cultivar options!

  • Ashton’s Pride: Lavender-pink, single flowers with yellow centers
  • Ashton’s Snow: Creamy white flowers in semi-double blooms
  • Long Island Pink: Single blooms with bright pink colors and ruffled petals
  • Mason Farm: Pink, single flowers with a white tinge
  • Northern Exposure: Pink buds that open to single white, papery flowers
  • Winter’s Darling: Deep pink flowers with anemone shapes
  • Winter’s Fancy: Deep rich pink, semi-double blooms
  • Winter’s Interlude: Light pink blooms with anemone shapes and peachy centers
  • Winter’s Joy: Bright bold pink, semi-double blooms
  • Winter’s Star: Single lavender-pink pale blooms with yellow centers
  • Winter’s Water Lily: Elegant white flowers with a formal double shape

No matter which fall-blooming camellia you choose, if you give it the proper care, it will love you right back with abundant growth and stunning blooms that bring an air of southern charm and hospitality to your yard.

camellia_250x250_3camellia_250x250_1

camellia_250x250_2

Healthy Soil: Winter Cover Crops

It’s fall and our annual and vegetable gardens are winding down for the season. Now is the time to invest a little extra time and effort to prepare your soil for next year. Whether your garden is large or small, all annual planting beds will benefit from the addition of a winter cover crop.

Benefits of Cover Crops

A cover crop is a fast-growing, low-maintenance crop that can be used to protect your garden and landscaping beds in fall and winter. Depending on the crop you choose, it can provide many benefits to your garden, including…

  • Stabilizing soil and preventing erosion
  • Adding organic matter back into the soil to nurture later crops
  • Adding nutrients to the soil that have been used by previous crops
  • Suppressing disease that can wither new crops even before they start
  • Repressing weeds that will take over a garden
  • Improving soil structure with aeration and better drainage
  • Encouraging beneficial insects that will help later crops

Recommended Cover Crops

Different cover crops work best in different areas, and the climate, soil type and growing season will help determine which cover crops will work best for your gardening needs. The most popular recommended cover crops for our area are oats, rye and wheat.

  • Oats
    Sow 6-8 weeks before the first hard frost. Planted early, oats will provide a quick covering with the added benefit of providing an early planting time for next spring’s crops. Oats are not winter hardy, but they will grow in the fall and die in the winter, leaving behind nutritious mulch that will easily decompose when incorporated into the soil in the spring. This is a great cover crop choice for low- or no-till gardens. Sow at 2 lbs. per 1,000 sq. ft. for the best coverage.
  • Winter Rye
    Sow 2-4 weeks before the first hard frost. This is a good choice for gardeners who have late season crops and don’t want to cut off that last harvest. If hardened off before frost arrives, winter rye will continue to grow over the winter. Rye is a vigorous grower and can be difficult to turn in the spring, so bear that in mind depending on what crops you will be planting in spring. Sow at 3-4 lbs. per 1000 sq. ft. for appropriate coverage.
  • Winter Wheat
    Sow 2-4 weeks before the first hard frost. Wheat will cover quickly but is not as aggressive as winter rye. Winter wheat is also leafier, making it easier than winter rye to turn into the soil in the spring. Sow at 3 lbs. per 1000 sq. ft. to provide good coverage.

Cornell University provides a tool to assist you in choosing the correct cover crop for your situation. (https://covercrops.cals.cornell.edu/decision-tool.php)

Planting Cover Crops

Before planting a cover crop, clean out garden beds, removing all roots and plant material. Compost all plant matter that is not diseased. Broadcast seed evenly and cover with soil. Water thoroughly when planting and when necessary during dry periods. In the spring, till or fork oats into the planting bed and you are ready to plant. For winter rye and wheat, mow or chop tops 4 weeks before planting leaving cut cover crop on top to dry. Till or fork dried wheat and rye into the bed before planting.

With the appropriate cover crop, you can protect your garden’s most valuable asset – the soil – and be sure it is ready for spring planting.

oats_250x250

rye_250x250

wheat_250x250