Author Archives: GCSDev

Repotting Houseplants

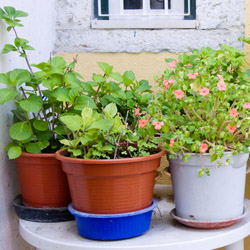
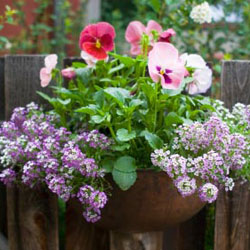
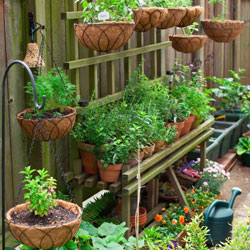
Fall is an excellent time to repot many houseplants. Potted plants that have been growing outdoors during the summer have probably grown quite vigorously due to the high light levels and greater humidity. If the top growth of the plant has increased in size by 20 percent or more, it probably should be transplanted into a larger container so the roots can stretch and settle comfortably.

Before You Repot

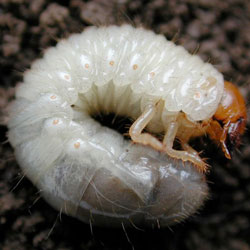
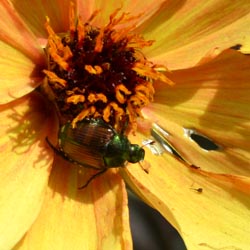
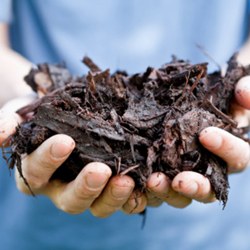
Before repotting, check the plant and the soil carefully for insects.  Add systemic granules to the soil and spray the leaves with an insecticidal soap to remove any unwanted pests. If an insect infestation is particularly bad, it may be necessary to remove most of the plant’s soil and replace it with fresh potting soil. Avoid using soil from the garden, however, which will harbor insect larvae and eggs as well as weed seeds and other material you do not want in your houseplants.

Acclimating Plants

Bring your plants indoors well before any danger of frost for proper acclimation to the indoor environment. The change in light levels and humidity could shock more delicate plants, and they may wilt temporarily or drop leaves before they adjust to the new conditions. If possible, bring them in just a few minutes at a time for several days, gradually increasing their indoor time to several hours before keeping them indoors all the time. Flowering tropicals will also benefit from cutting back some of their foliage to avoid shock before being brought indoors.

To help houseplants overcome the transition from outdoors to indoors, position them in a bright, sunny area and consider adjusting indoor temperature and humidity controls to more closely mimic outdoor conditions. Make adjustments slowly and gradually, and the plants will adjust.
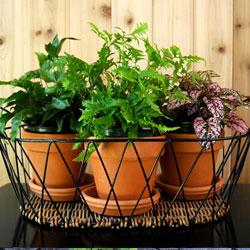
Time to Repot

Once your houseplants are adjusted to their indoor fall and winter environment, they can be safely repotted without adding to their stress. Repot the plants early in the day, and move them to a slightly larger pot. Avoid jumping several pot sizes, which could lead to excessive root growth while the foliage is neglected. Be sure to fertilize and water the plants appropriately to provide them proper nourishment as they settle into new pots. Do not expect luxuriant foliage growth right away, however, as it will take some time for the plants to begin growing again, especially in fall and winter when most houseplants are entering a dormant, slow growth period.

By repotting your houseplants in fall, you can help healthy, vigorously growing plants adjust to a new environment and continue their growth with ease in a new, larger, more comfortable pot.

Repotting_1

Fall Horticultural Oil Application

Autumn is an excellent time to apply horticultural oil. The oil smothers many soft-bodied insects and hard-shelled scales that are impenetrable to many insecticides, and can therefore help control some of the most stubborn insect populations. But is it right for your plants?

About Horticultural Oil

Horticultural oil, or hort oil, is typically derived from petroleum, and is a type of ecologically-friendly mineral oil. Some cottonseed and soybean oils can also be effective horticultural oils. Emulsifying agents are typically added to these oils so they can be mixed with water and used as a spray, which helps distribute them evenly over plant foliage to be most effective.

Pests That Don’t Like Horticultural Oils

Different types of horticultural oils can be effective against many unwanted garden pests, including…

  • Spider mites
  • Aphids
  • Whiteflies
  • Mealy bugs
  • Psyllids
  • Lace bugs
  • Caterpillars

In addition to smothering the larvae or insects directly, the heavy oil also makes it difficult for many insects to crawl therefore starving them to death and preventing them from spreading diseases from plant to plant. Additionally, the oil repels many insects looking for winter homes. The oils also act as fungicide against powdery mildew, rust and leaf spot on some plants.

Applying Horticultural Oils

Application of horticultural oils is easy, requiring only a simple hose-attached sprayer. Because oil and water do not mix, frequent agitation by shaking is required even if the oils are mixed with other agents to be more sprayable. These products are most effective if applied when plants are dormant, since oil-based products can burn and harm actively growing foliage, buds, flowers and fruit. Some lighter weight, summer-formulated oils are available, but they should be used only sparingly and only if absolutely necessary. Autumn and winter are the best seasons to apply horticultural oils when insects are a problem, though autumn applications can occasionally cause problems with plants dying back and other winter damage. Because the oils can evaporate and dissipate quickly, they should only be used when insects are present, otherwise they will be ineffective. In freezing weather the oil coverage will be inconsistent, so cool but not bitterly cold temperatures are best.

Of course, always follow the instructions for proper application rates, plant sensitivity and ideal weather conditions to ensure the most effective treatment. Because these oils are still pesticides, protective gear such as gloves and goggles should also be worn to avoid accidental irritation or more severe contamination.

Using hort oils can be a great way to control insects on your plants, but only if the oils are used appropriately. Come in for a consultation to see if these products can help end your insect problems.

FallHortOIl_1

Japanese Beetle Reduction Methods

Japanese beetles can be a scourge of the garden and landscape, but what can you do to keep these pests at bay?

About Japanese Beetles

Japanese beetles (Popillia japonica) spend their early lives as underground grubs eating turf grass roots. They prefer well-watered, healthy perennial ryegrass and hard fescues in full sun. Emerging as adult beetles in mid-June through July, they begin feeding on over 200 varieties of plants, including shade and fruit trees, shrubs and ornamentals. They also mate and the females lay 50-70 eggs in the soil.

The eggs hatch in the fall and white C-shaped grubs begin eating roots. Autumn is the best time to check your lawn to see if the grubs are present. Dig several one-foot squares 6″ deep in your lawn, turning over the turf and looking for these distinctive grubs. If you find them, taking action immediately can help control the infestation.

Reducing Japanese Beetle Populations

Non-chemical preventative treatments include spraying beneficial nematodes such as Heterorhabditis or Steinernema onto moist lawns and soil in September. Nematodes, naturally occurring soil organisms, are parasitic to soil grubs and many insect larvae, including Japanese beetles. Spray in the evening and ensure the soil is moist to at least 6″ deep. One product, Lawn Guardian, contains two types of nematodes; one lives deeper in the ground to give a “double whammy” to the feeding grubs.

Natural predators include ground beetles, ants and Tiphia, a parasitoid. Applying Bacillus popilliae Dutky to the soil causes “Milky Spore Disease” to the grub. Chemicals to control the grubs include trichlorfon, imidacloprid, halofenozide or thiamethoxam, so look for pesticides that include these compounds to help eliminate Japanese beetles. Neem oil can also be helpful to control these pests. As always, read and follow the directions carefully when using any type of chemical pesticide.

In the garden, row covers can help minimize Japanese beetle populations during the growing season, but this can also reduce crop productivity as fewer flowers are pollinated. Still, if an area is heavily infested with Japanese beetles, a smaller crop may be a better alternative than accidentally nurturing these pests. If only a few beetles are present, hand-picking them off plants and killing and disposing of the insects – toss them in a bucket of soapy water – can keep the populations manageable.

For the latest information and updates on Japanese beetles, as well as more control tips, contact your favorite garden center or County Agent.

beetle_1JapaneseBeetle_2

Freshen Up for Fall

Transform summer garden pots, planters and window boxes into magical displays this fall. The addition of mums, winter pansies and ornamental cabbage and kale are always excellent choices but you can really spice things up with the inclusion of a few of these colorful, cold-hardy selections. Which ones will look best for your autumn landscape?

  • Acorus gramineus ‘Ogon’
    This graceful, fan-shaped acorus variety is ideal for adding height to plantings. It keeps its color and shape into the winter for visual interest as other plants lose their vibrancy.
  • Acorus gramineus ‘Variegatus’
    This is the white-variegated version of ‘Ogon’. Its white-green striping is the perfect complement to mixed planting in silver, pink, purple or blue, and its lightness adds freshness to the arrangement.
  • Ajuga reptans ‘Burgundy Glow’
    This ajuga has a trailing habit and pretty, variegated leaves. Its blue flowers are scattered in fall and summer but this plant blooms profusely in springtime.
  • Ajuga reptans ‘Mahogany’
    The rich mahogany color of the shiny, short-stemmed leaves turns darker and more lustrous in the winter, ideal in a frosted or snowy landscape. Pretty bright blue flowers punctuate this creeper, mostly in the spring.
  • Ceratostigma plumbaginoides ‘Leadwort’
    The prolific flowers of this plumbago are an intense gentian-blue and the foliage turns bright red in low temperatures, adding visual heat to the landscape even on cold days.
  • Euphorbia amydaloides ‘Purpurea’
    This pretty perennial is exceptionally frost resistant. ‘Purpurea’ features upright branches with leaves that form a rosette pattern and turn from reddish to purple in the cold.
  • Helichrysum thianschanicum ‘Icicles’
    Here’s an easy, fast-growing helichrysum variety with striking, velvety-silver leaves and a compact growth habit.
  • Lamiastru galeobdolon ‘Herman’s Pride’
    ‘Herman’s Pride’ has serrated, shiny silver leaves with green venation and yellow flowers in the spring. The plant trails as it grows, making it perfect as an accent in hanging baskets, taller containers and window boxes.
  • Lavendula lantata ‘Silver Leaf Lavender’
    This lavender variety has silvery-white leaves that are velvet-like to the touch and hold their color throughout the winter. Dark purple-blue flowers appear by the second year and contrast beautifully with the foliage.
  • Lysimachia nummularia ‘Goldilocks’
    Proven to do equally well in both sun and shade, ‘Goldilocks’ exhibits wonderful versatility. The golden foliage creeps and hangs in lush profusion of round, shiny leaves.
  • Salvia officinalis ‘Icterina’
    This sage has a glowing, golden-yellow variegated leaf. ‘Icterina’ maintains its shape and holds its color long into the winter.
  • Salvia officinalis ‘Purpurascens’
    The eggplant-colored leaves of this sage warm up any planting. Try it as a culinary herb as well and enjoy the subtle taste.
  • Salvia officinalis ‘Tricolor’
    ‘Tricolor’ offers a unique combination of purple leaves with white borders that turn pink when temperatures drop.

No matter which of these plants you opt for, you’ll enjoy the rich colors and variation they bring to your autumn plantings.

freshen-1

freshen-2

Fall in Love with Fall Pansies

Ideal for fall gardens, pansies offer a colorful display for almost six months – in the fall when they are planted, in the winter during a stretch of sunny days and again in spring! Winter pansies may be planted anytime starting in mid-September and continuing through October. Multiple plantings spaced a week or two apart can also ensure even more blooms to enjoy throughout otherwise drab months.

Planting Pansies

As with any plant, pansies perform better if the soil that you place them in is well prepared. Choose a planting location that is well-drained and work in 4-6 inches of rich organic matter, such as garden compost, peat moss or Bumper Crop. Plant pansies at about the same level, or slightly higher, than they were growing in their market packs or containers, taking care not to plant too deep or the plants may wilt and rot and the roots could smother. After planting, mulch and water the bed thoroughly. Remember to check the plants often during the first three weeks after planting or until new growth begins, to ensure adequate moisture necessary for healthy growth. Because these plants require very little care, no other maintenance is usually necessary for them to reach their full potential.

Where to Plant Pansies

These versatile blooms can be used in many different parts of your garden or landscape. Add a graceful drift of single-colored pansies or a mass of mixed colors to brighten a border, under a tree or along a fence, pathway, deck or wall. Try tucking single plants in garden beds around perennials and shrubs that have finished blooming to brighten up an otherwise dreary section of the landscape and to help mask older, spent growth. Pansies also do well in containers placed on a deck or patio or next to the entrance of your home to greet your guests with welcoming color. Try pansies in a hanging basket and you can even move them indoors to enjoy when the weather is too poor for outdoor gardening. A small container of fall pansies can also be a great gift for winter holidays, birthdays or just to brighten the day of anyone who could use a touch of color in their life.

With so much color to enjoy in so many ways, fall and winter pansies should be a staple of any garden and will bring great gardening joy to the landscape even during colder, dreary months.

fall-pansies-1

fall-pansies-2

fall-pansies-3

Tulips: Spring Starts Now!

Members of the lily family, tulips are native to central and western Asia. In the 16th century, they were introduced to the Netherlands where most tulip bulbs are grown today. With over 100 species and nearly 3,000 varieties, tulips have been divided into 14 groups, including Darwin hybrids, Triumph, Lily-flowering, Double early, Rembrandt, Scheepers’ Hybrids (or French) and Parrot variations. Their classification is based on form and habit. A 15th group includes species tulips with the smallest plants growing to just 3 inches.

Tips for Planting Tulips

Tulips are an easy care addition to any landscape, and they are easier to plant than many gardeners realize.

  1. Choose only top-sized bulbs without any bruises or obvious damage. Bigger bulbs generally indicate better quality and bigger flowers.
  2. Plant bulbs as soon as purchased or store in a cool, dry location.
  3. Choose a sunny (or part sun) location with well-drained, rich soil.
  4. Plant 2” deeper than recommended to promote re-blooming each year.
  5. Apply bone meal 3 times a year – in fall when you plant, in spring as bulbs emerge from the ground and after flowering has finished. This will provide food for the foliage and bulb growth for next year’s flowers.
  6. Protect tulip bulbs from pest damage by laying wire mesh on top of your bed just beneath the soil. Sprinkling VoleBlok in the holes when planting can also be helpful.
  7. Mulch and water the bed thoroughly after planting.
  8. Plant before the ground freezes.
  9. Deadhead flowers after they have faded, but leave the foliage to die back naturally. Do not cut off the leaves until they have turned brown, or else they will not develop large enough bulbs for a good show the next year.

Tulip Timesaving Tip

Don’t have much time to plant a large, luxurious tulip bed? Plant 100 tulips in just 1 hour!

  1. Choose a part to full sun location and dig a hole 6’ x 6’ to a depth of 6-8”, placing the displaced soil on plywood or cardboard.
  2. Place 100 tulips, pointed end up, evenly over the area.
  3. Gently slide the soil from the plywood or cardboard onto the tulip bulbs. Tamp the soil lightly, sprinkle the bed with bone meal and water well. In spring, the entire area will bloom!

Tried & True Tulip Selections

Some tulips can be finicky, and while some tulips will disappear from your garden after a year or two, these selections promise trouble-free blooms for years!

  • ‘Daydream’ – Darwin tulip, changing colors while in bloom to vibrant apricot-orange, blooms mid-April into May, Ht: 22”. Fragrant.
  • ‘Lilac Wonder’ – Species tulip, large rose-lilac flowers with yellow bases and anthers, blooms May, Ht: 7”. Prefers full sun.
  • T. praestans ‘Fusilier’ – Multi-flowering species tulip, orange-scarlet flowers, blooms April, Ht: 8-12”.
  • T. clusiana var. chrysantha – Species tulip, good naturalizing tetraploid, deep yellow flushed with rose toward the edges, blooms April, Ht: 8”.
  • ‘Pink Impression’ – Darwin tulip, huge flower with strong, clear pink flowers, blooms mid-April to May, Ht: 22”.
  • ‘Menton’ – Scheepers’ hybrid, blooms are shades of apricot, rose, pink and peach, late-blooming, Ht: 26”.
  • ‘Mrs. John T. Scheepers’ – Huge Scheepers’ hybrid, golden-yellow tetraploid is a three-time award winner, late-blooming, Ht: 26”.
  • ‘Persian Pearl’ – Species tulip, deep magenta-rose with buttercup yellow star on the inside, blooms April, Ht: 6”.
  • ‘Maureen’ – Scheepers’ offspring, large, oval-shaped flowers of glistening white, blooms late-May, Ht: 28”. Four-time award winner!
  • ‘La Courtine’ – A Scheepers hybrid, yellow flowers are oval-shaped, flamed with red from the bottom up, late-blooming, Ht: 26”.

With so many to choose from, it’s always time for tulips!

tulip-2tulip-3tulip-1

Bringing Your Tropical Plants Indoors for the Winter

As the summer comes to an end and autumn approaches, the days get shorter and cooler temperatures signal the time to ready your plants for winter. How can you protect your treasured tropicals from winter damage?

Overwintering Tropical Plants

Don’t wait until frost warnings or freezes occur to bring tropical plants inside, especially since these plants are more susceptible to dropping temperatures. Try to have all of your plants acclimated to the new indoor environment by the end of October. Avoid the temptation to move your tropicals back outside if it suddenly gets warm, because they will have to re-acclimate when you bring them back inside again. With a little extra care even exotic hibiscus can be over-wintered inside the house.

First, it’s a good idea to prune approximately one-eighth to one-fourth off the total height of the plant’s foliage. This helps reduce the shock that the plant receives with the change of conditions when bringing them indoors. Check the plants for signs of insects and treat them with insecticidal soap or pyrethrin spray as well as a systemic insecticide that will provide protection for up to six weeks.

Position indoor tropical plants in a very bright location that receives no less than 6 hours of light per day. If the winter is very cloudy, supplement your plants with an artificial light source. Be sure the room is warm, but avoid putting the plants too close to a heating vent, which can dry them out drastically.

Because they are tropical plants, they will need good humidity which can be achieved by using a humidity tray. Use a saucer that is at least 3-4 inches larger than the pot and fill it with an inch of stones. Pour water over the stones until they are half covered, then place the pot on top of the stones. The humidity immediately around the plant will be increased, but avoid setting the pot directly in any water, which can lead to fungus and rotting. Grouping several plants close together can also help them preserve humidity for more luxuriant growth.

Fertilizing should be continued throughout the winter, but at a rate of once per week. You will find the plant will not utilize as much water in the winter because its growth has slowed. Generally, plants should be watered every 4-7 days depending on location, pot size, soil type and plant type.

If you have any questions about winter care of your plants, our staff will be glad to help you keep your tropicals in good condition all winter long.

tropical-2

tropical-1

Problems With Your Compost Pile? Fix Them!

A compost pile should be part of every gardener’s yard, since it adds so many benefits for recycling and providing organic material in the garden. There are times, however, when it can be tricky to keep a compost pile in peak condition and breaking down material most efficiently. If you encounter any of these common problems, you can easily correct them and keep your compost pile at its best.

  • Pile is Too Dry
    Without adequate moisture, beneficial microorganisms cease to function and decomposition stops, turning a compost pile into a clumpy mess that does not decay into usable organic material. Keep the pile moist at all times, but not overly wet. A dampness like a squeezed sponge is ideal. It may be necessary to use a hose to water your pile occasionally, or a tarp or piece of plastic over the top of the pile can help keep moisture in the pile instead of evaporating.
  • Foul Odor
    A stinky compost pile is no gardener’s friend, and over-watering the pile will compact the material. When air space is decreased, the pile becomes anaerobic, resulting in an unpleasant odor. Turn the pile frequently to increase aeration and add larger pieces of dry, porous, carbon-rich material such as wood chips or straw to absorb excess water and improve air circulation.
  • Pile is Cool
    Check all the items required for a hot, quickly-decomposing pile: carbon, nitrogen, air and water. Correct any deficiencies. Another issue may be that a pile that is too small will have difficulty insulating itself. Increase the size of your compost pile by adding more material so it can generate sufficient heat from decomposition to keep itself warm.
  • Pests in the Pile
    While insects and worms are welcome helpers in a compost pile, a poor pile may also be attracting mice, rats, squirrels, raccoons and other wildlife. This usually means that the wrong material was used for composting. Never add meat, fish, bones, dairy products or oily food to the compost pile, all of which can have strong odors that will attract unwanted wildlife. Similarly, no human, cat or dog manure should be added to the pile. Avoid adding weed plants or diseased plants as well, since those weed seeds or disease spores could be transmitted to your garden or landscape when the compost is spread.
  • Poor C/N Ratio
    When planning the optimum conditions for compost decomposition, the standard recommendation is 3-to-1; three parts carbon to one part nitrogen. Carbon-based material is brown and nitrogen-based material is usually, but not always, green. Chopping or shredding additions to the compost pile will speed up the decomposition and help keep the pile balanced.

    The best materials to add to your compost pile include…

    Brown Material (Carbon-Based)
    – Dried, dead Leaves
    – Shredded paper, including newspaper
    – Wood ash
    – Sawdust
    – Eggshells
    – Chipped brush and wood chips
    – Straw and twigs

    Green Material (Nitrogen)
    – Grass clippings and sod scraps
    – Vegetable and fruit peels, scraps and rinds
    – Disease and insect-free plant material, such as clippings and prunings
    – Horse, cow, chicken and rabbit manure (herbivores)
    – Coffee grounds and used coffee filters
    – Used tea bags
    – Used potting soil

No matter what issues your compost pile may be having, problems are easy to correct and you can quickly adjust your pile to be productive and efficient. Before you know it, you’ll have plenty of rich, nutritious compost to nurture your garden and landscape all year long.

compost-1

compost-3

compost-2

Get Started Composting

Fall is an excellent time to start a compost pile with all of the leaves falling, and if you develop compost now, you will have a rich source of organic material for your garden and flowerbeds in spring. Getting started with compost is fairly simple if you keep in mind the following…

  • Size Matters
    Smaller particles break down faster than larger chunks. Shredding or mulching garden wastes will help speed up the process and develop usable compost faster. Chop up larger pieces of household materials before adding them to your compost pile to speed up their decomposition.
  • Take a Turn for the Better
    Turning helps aerate the pile and shifts outer parts closer to the center where they can heat and decompose more effectively. A well-mixed pile will also have better consistency and more evenly distributed nutrients. Use a pitchfork, spade or rake to gently turn your pile periodically, such as once every 1-2 weeks or whenever you add a large amount of new material to the pile.
  • Know What to Compost
    Materials that can be composted are sod, grass clippings, leaves, hay, straw, manure, chopped corncobs, corn stalks, sawdust, shredded newspaper, wood ashes, hedge clippings and many kinds of plant refuse from the garden. Some household waste, such as coffee grounds, banana peels, eggshells and vegetable peelings are also ideal for a compost pile and will reduce the trash you accumulate.
  • Avoid Unwanted Materials
    Materials to avoid composting are large amounts of weeds, grease, fat, meat scraps and bones, cheese, coal ashes, diseased plants, cut weeds and charcoal. These materials do not decompose readily and can create poor quality compost. For example, meat, grease or dairy products in your compost will begin to smell strongly, which could attract rats, raccoons or other unwanted visitors. Diseased plants or weeds can survive in a compost pile, contaminating your garden when you add the compost to the soil in spring.
  • Cover as Needed
    Covering your compost pile with a tarp or large piece of carpet can help preserve the heat and moisture essential to promote appropriate decomposition. The cover can also keep the pile from freezing or getting too wet in winter conditions, and it can easily be removed to add new material or turn the pile as needed.

Before you toss out your next bag of trash, check for compost material and start your pile today! Your garden will thank you tomorrow.

compost_2

compost_1

Gardener Holding Tree Bark Mulch

Over-Wintering Container Plants Outdoors

All containerized plants that are considered hardy in your zone can spend the winter outdoors, but you do need to take a little special care to keep them safe and comfortable as temperatures drop. Despite their hardiness, winter is still a challenging season, but it is possible to keep your container plants healthy until the days grow longer and warmer again.

Options to Overwinter Your Container Plants

  • In the late summer or fall, removed the plant from its container and plant it in the ground while the soil is still warm. Another method is to bury the pot, with the plant in it, in the garden and remove the pot following spring. Both of these methods will help insulate the root system, preventing it from freezing solid and killing the root system.
  • Place containerized plants in an unheated garage but along a heated wall. This is an excellent method for very large pots or porous pots that tend to break apart from the constant cycle of freezing and thawing, and so would not be very hardy if buried. For extra root protection and insulation, wrap the pots in plastic bubble wrap or wrap an old comforter or quilt around the pots.
  • Group pots together along the sunny side of your house or shed. If this area is windy, create a windscreen with stakes and burlap. Place bales of straw or hay around the perimeter of the grouping up against the pots to further protect plants from cold winds. Fill in areas between pots with mulch, shredded leaves, grass clippings or hay for insulation. Lay evergreen branches or place a layer of mulch on top of the pots for additional protection.
  • Use a cold frame covered with plastic or Reemay fabric to help control temperatures and reduce light as well, helping plants stay dormant in winter. It will still be necessary to use mulch, shredded leaves or hay around and in-between pots for insulation. Rodent control, such as Havahart traps, may be necessary when using this method.

Watering Container Plants in Winter

Make sure that plants go into the winter with moist soil so that there is water available to plant roots. Check soil moisture occasionally, never allowing it to dry completely. It is also a very good idea to spray needled and broadleaf evergreens with an anti-desiccant. This acts as a protective coating for plant foliage and stems as it helps them retain moisture.

With just a little care and forethought, you can easily prepare containers for winter without risking the plants and arrangements you have so carefully cultivated.

over-winter-2
over-winter-1